This post was originally published on www.geico.com
The Task: Oil Change
The cost of an oil change ranges from $20 to $55, according to Angie’s List.
To do an oil change on our own, you’ll need:
- Oil filter wrench
- Box end or socket wrench
- Large drain pan
- Funnel
- Latex or rubber gloves
- Ramps or jack stands (if needed)
STEP 1: BREAK OUT YOUR OWNER’S MANUAL
Just about anything you’ll do maintenance-wise first requires that you review the particulars of your make and model. In this case, your manual should detail how frequently you should change your oil, how much oil you’ll need, and more importantly, the kind of oil needed to keep your engine running smoothly. Be sure, too, to buy an oil filter that will last until your next oil change; when in doubt, your local auto parts retailer should be able to guide you to the right filter type.
STEP 2: ELEVATE YOUR RIDE
In order to gain access to your car’s undercarriage, drive onto your ramps or use a jack and jack stands to raise it up.
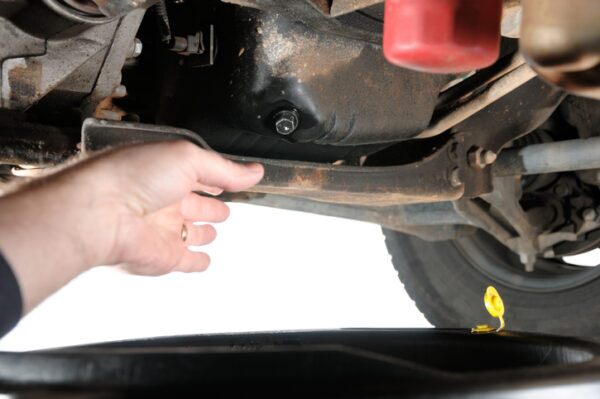
 STEP 3: FIND YOUR DRAIN PLUG
 STEP 3: FIND YOUR DRAIN PLUG
Here’s where you’ll need to get down and dirty: The drain plug is located either underneath or on the side of the oil pan, usually at the bottom of the engine (be sure to consult your manual so you know which bolt it is). Once you’ve found it, place your oil-collecting container underneath, then unscrew it and allow the oil to pour out.
STEP 4: UNSCREW THE FILTER
Begin by removing the oil filter cap using a socket-style filter wrench. Working slowly, turn the filter counterclockwise using your filter wrench. As soon as it’s loose enough, continue to unscrew it using your hand. Once it’s free, dump the contents of your filter into your pan and set aside.
If your filter has a cover, look for the Allen bolt, usually located in the center. Loosen it and drain any oil that’s been caught in the chamber. Use a band-style oil filter wrench to loosen the cover, then remove the old filter.
STEP 5: PLACE THE NEW ONE
Try to clean around where the filter goes as best you can using old rags and some good old-fashioned elbow grease. Check to make sure no rubber from the seal of your old filter remains. Next, dip a (gloved) finger into your new container of oil, and use it to moisten the replacement filter’s gasket—this will help your filter adhere better to the engine. Once that’s done, begin screwing the new filter into place using a wrench, gently rotating it in a clockwise motion until it starts to show resistance. When you’re sure it’s secure, rotate it about ¾ of a turn more —but no more than that, as you don’t want it to be screwed in too tightly. (If your filter has a cover, there should be two new gaskets to help secure it—one for the cover itself, and a smaller one for the Allen bolt.)
STEP 6: REINSERT THE PLUG, THEN FUNNEL IN THE NEW OIL.
Replace the drain plug, and use the box end of a combination wrench to tighten it. (Again, be careful not to overtighten.) Be sure to consult your manual again—you may need to replace the plug’s washer with a new, single-use o-ring. Double-check that both the oil plug and your oil filter are in place. Good to go? Insert your funnel into the oil filler hole, and then slowly pour all but one quart of the oil in. Replace the cap and turn on the engine, allowing it to run for 30 seconds to a minute—just enough time to allow the oil to settle and circulate.
STEP 7: CHECK YOUR LEVELS.
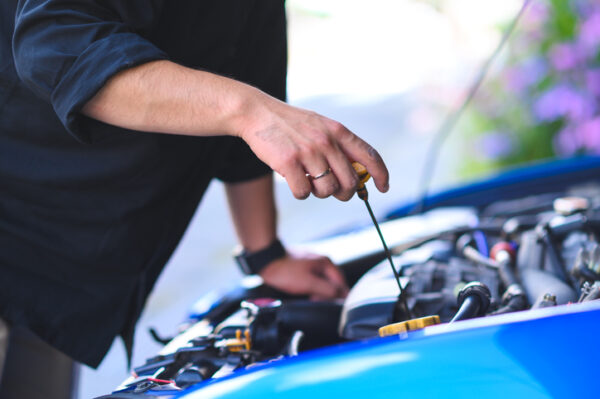 STEP 7: CHECK YOUR LEVELS.
Allow your vehicle to rest for 5 to 10 minutes. (If you’ve jacked your car up, now’s the time to lower it.) Unscrew the filler cap and, using your dipstick, check to see how high the oil level is. It will likely be a little low—remember, you left about a quart in the bottle—so keep adding oil (slowly!), checking the dipstick level with each pour. You’ll know your reserve is full when the oil reaches the stick’s highest puncture mark. Once you’re finished, replace the filler cap.
STEP 8: GO FOR A TEST DRIVE.
A few times around the block should do the trick.
STEP 9: CHECK YOUR LEVELS (AGAIN!)
Once your engine has cooled (wait about 5 to 10 minutes), unscrew the filler cap and use the dipstick to see how high the oil reaches. Is it still showing you’re “full”? Congrats! If not, don’t panic: just repeat steps 7 and 8 above. You’ll be ready to hit the road in no time. (Once you are, we suggest cruising on over to your local auto repair store—many will dispose of your old oil and filters for you.)
Ever been stranded on the side of the road with a broken-down car? Not fun, right? Get peace of mind with GEICO’s Emergency Roadside Service. You can even request help right from the GEICO Mobile app. Add it to your auto policy today for as little as $14 a year per vehicle.
[ad_1]